
Hello, everyone! Wendy Page here with some basic info about extracting elements for your digital scrapbooking kits.
For this tutorial I’ll be working with a simple element, a tiny flower that has been sitting on my desk for the longest time. I’ll show you the steps I use to ensure I get the best scan and extraction that I can. I’m not going to touch on photographing elements simply because I rarely do so and the only advice I can give is that a tripod or flat surface is a must. After that is when I get lost.
Everyone has their own preferences and there are certainly many, many different ways of going about it, these are simply the ones that I’ve found work best for me and the equipment I have. Patience, time and practice are the common elements no matter which method you use.
To begin, you’ll want a scanner that has a CCD sensor, giving it a much better depth of field. I do not know all of the techie aspects, but this link gives a good visual of the differences.
Keep in mind that even with a CCD scanner not everything is going to be the best for scanning, you just have to play around with positioning, angles, etc. I still can’t get a good curled ribbon that doesn’t get squooshed flat!
The 2 scanners I know of that are widely used are the Canoscan 8800F and the Epson V series. Mine is the Epson V200 and cost was a large factor in my decision, but I think I get fantastic results with it and have been very happy. When I win the lotto I’ll upgrade just so I can play and compare!
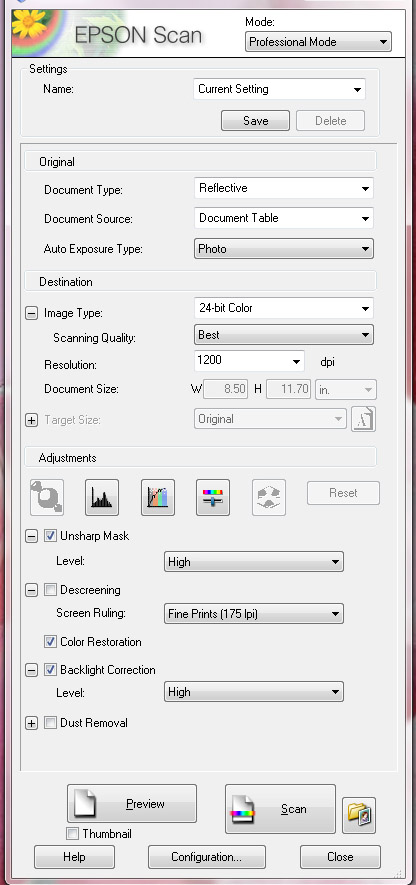
So, to begin you’ll first need to adjust your scanner settings. What works well for one element may not work for another, so don’t be afraid to mix up your settings. I have my basic set up saved as the default and then I can go from there. Below are the settings I use; they’re not a big secret, just what works well for me…
MY SETTINGS (see also, image below):
- Professional mode
- document = reflective
- source = document
- table auto exposure
- type = photo
- image type = 24 bit color
- scan quality = best
- resolution = 1200
- target size = original-100%
- unsharp mask = checked at high level
- descreen = unchecked
- color restoration = checked
- backlight correction = checked,level high
- dust removal = unchecked
The settings I adjust most often are the color restoration and back-light correction — on some items the settings can make things look really funky color wise.

You’ll notice I scan BIG! I’ve found that first it makes it much easier on my eyes when extracting as well as seeing all the little details you’d normally miss and second it allows for a nice sharp element when re-sized to 300ppi. What may look a little blurred at 1200ppi looks great when you size down and sharpen! The other benefit is when you do sharpen it doesn’t look all pixel-y.
You will want to make sure your element is covered by something while scanning to prevent goofy lighting. I’m positive that’s the technical term. *grin* There are several different ways to do this and it all depends again on what you are scanning. Flat items I simply close the lid. If I’m looking for a little bit of depth, such as curled edges, I’ll use a white t-shirt so the item is not totally flat. This also works well for round items — I use the shirt and hold it with my hand cupped around the object to prevent it from tipping over. There’s any number of things you can use such as box lids covered in white paper, etc.
Once you’ve got a scan that you’re happy with it’s time for that extraction business! Again, there are many different methods and it all depends on what YOU are comfortable with and the results you’re getting. I mentioned patience, time and practice. Lots and lots of patience, time and practice! There’s no getting around it unfortunately unless you have someone doing them for you, lol. I don’t mind telling you that it took me a couple years of starting and stopping before I got into a good groove and was consistently happy with my results. That’s just me, I have a short attention span, am impatient and as several people may tell you I am ALL about the little details. Maybe not in such a nice way… but I can’t help it, I’m a Virgo and proud of it! (Other Virgo’s will TOTALLY get what I mean, lol) Anyway, go at your own pace and if you get frustrated, step away for a bit and try again later!
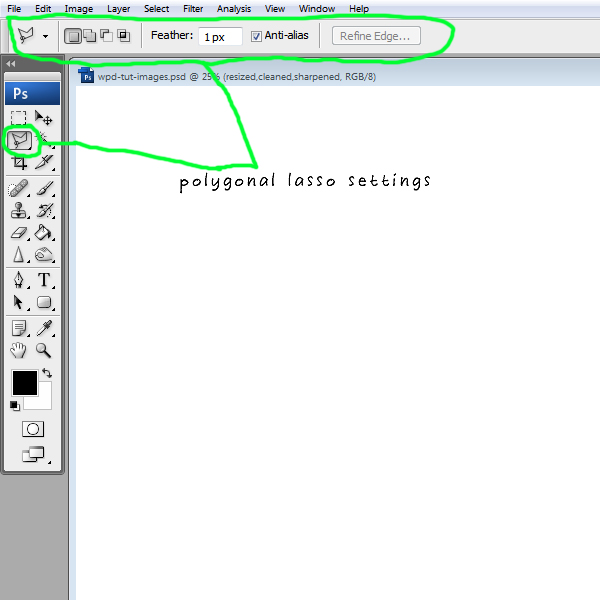
OK, back on track here — open your file in Photoshop and convert your background to a layer. The two methods that I prefer myself are using the polygonal lasso tool (stop booing!) and lately my new favorite way is quick masking. We’ll begin with the polygonal lasso. I have it set as a new selection with a feather of 1px and anti-alias checked. I also blow my scan up to 200% to work with.
I should mention here that I use a tablet and pen and have for years. Extracting can certainly be done using a mouse but it’s a bit more tedious and the “feel” is different. I have much finer control using the pen and tablet.
To use the lasso you’ll click (or tap if using a tablet and pen) where you want to start and then continue advancing to the next point, click/tap and so on. Once you have a small area defined you’ll bring the selection out and away, taking as much of the background you want to remove as you can and close it by clicking on your starting point — you’ll see the “marching ants”. I then hit delete. 10 times. Yes, I hit delete 10 times. This gets me a nice clean edge and when re-sized you will not see a blurred edge. Hit CTRL-D to deselect and then start again in a new area.
It’s important to do small areas at a time. I’ve discovered that it doesn’t take very much to accidentally click/tap and have a selection cutting out pieces that you want to keep. It’s a real bummer if this happens when you’re 3/4’s of the way around and then have to start over! If it does happen simply deselect (CTRL-D) and begin again.
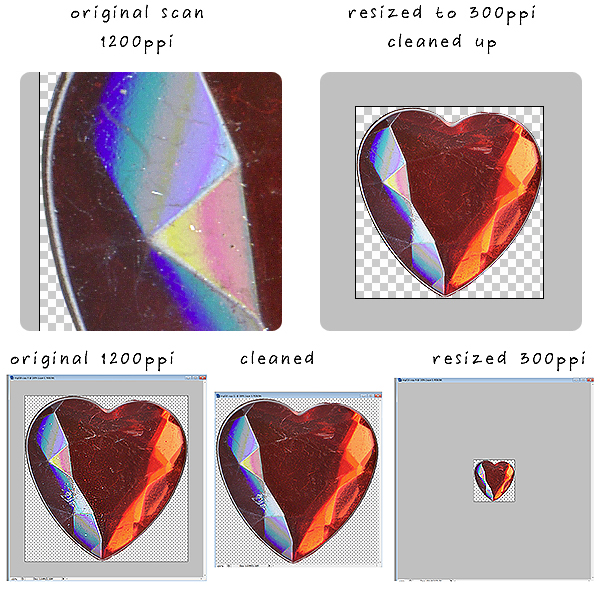
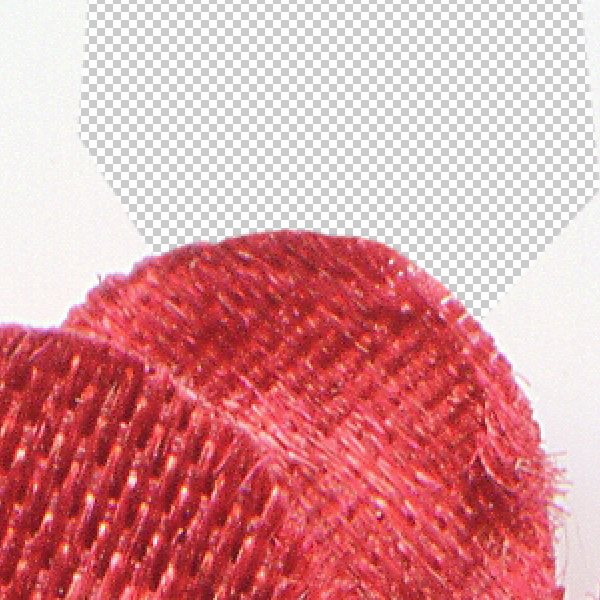
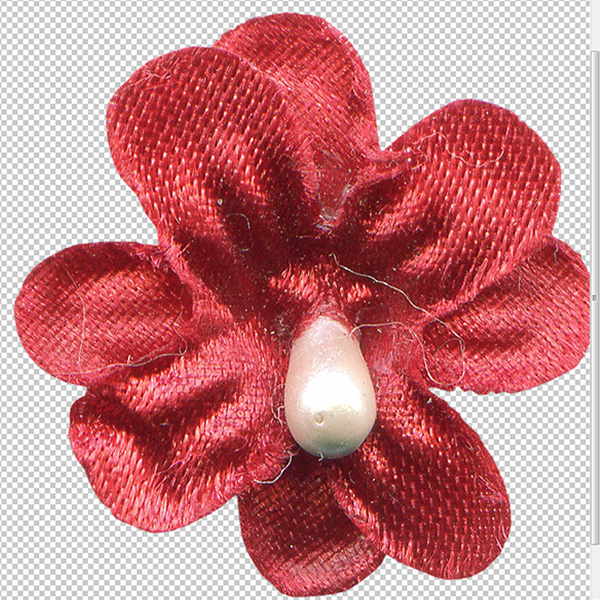
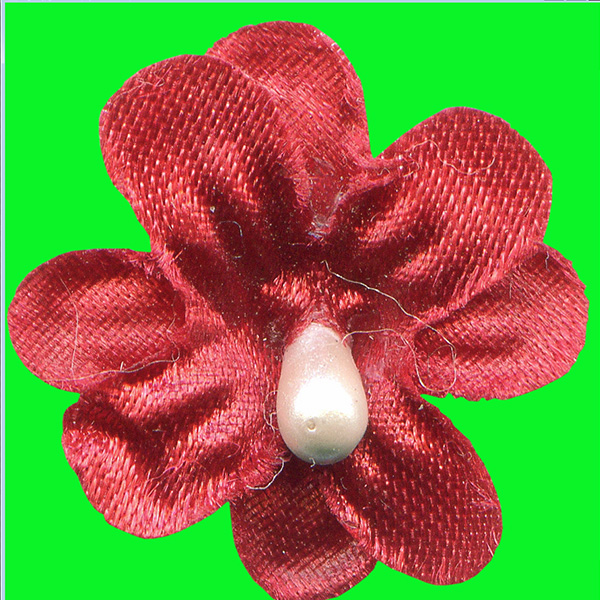
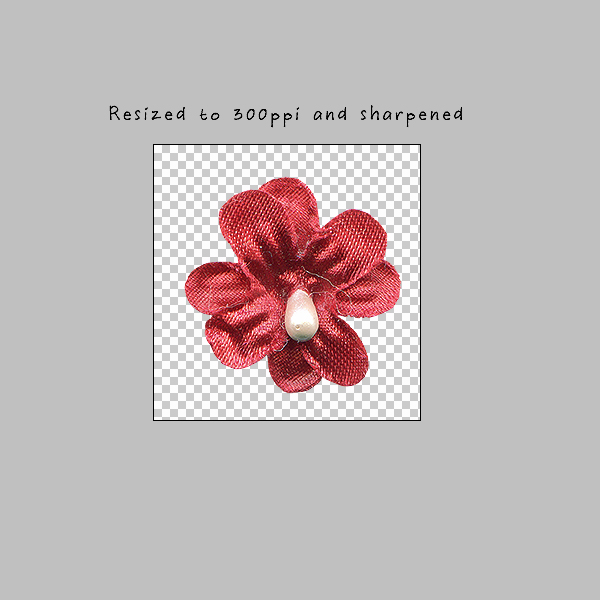
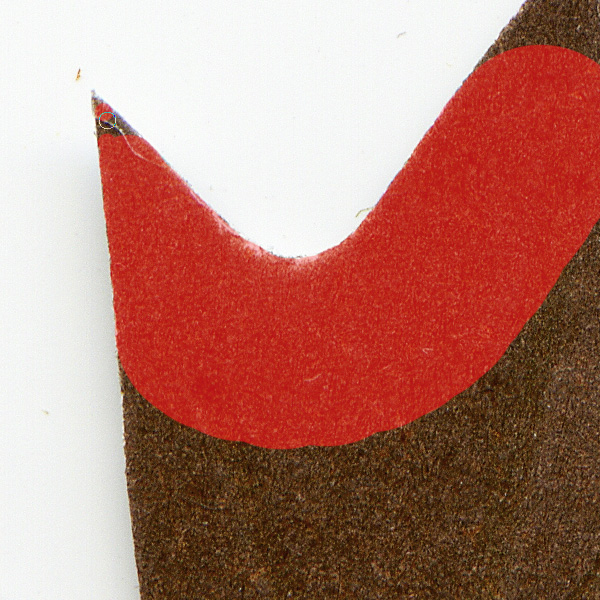
Now, you’ll notice with using the lasso that it’s not the greatest for getting those little details, such as fibers, etc. Curves can be a bit of a challenge as well because you don’t want it to look like a series of straight lines, you want it to look curved! Going slow and clicking/tapping frequent small short areas rather than larger longer areas is the key. Below shows the extracted flower at 1200ppi and 100%, the same on a bright back to see the edges, and then re-sized to 300ppi and sharpened.
The method I use now is quick masking. I don’t remember where I learned how, I do remember it was awhile ago, I tried, gave up and have just come back to it again recently. It’s my new best friend! It’s not necessarily any quicker but I have even more control over what I am keeping and what I’m removing, and it’s excellent for little details!
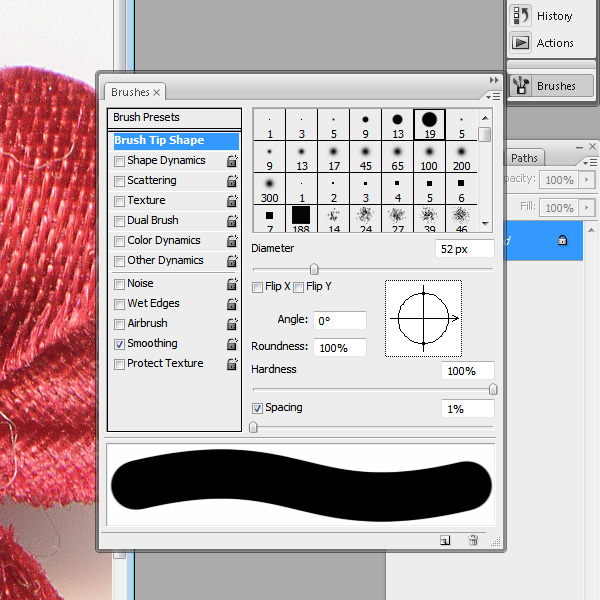
Again, you’ll bring your image into PS and convert to a layer. In your brush menu you’ll choose a hard round brush with 1% spacing and shape dynamics turned off.In the tool palette is the icon down at the bottom, looks a little like a camera maybe? A rectangle with a circle in the middle. This is your quick mask. Have your brush selected and set up with the foreground black and the background set to white.
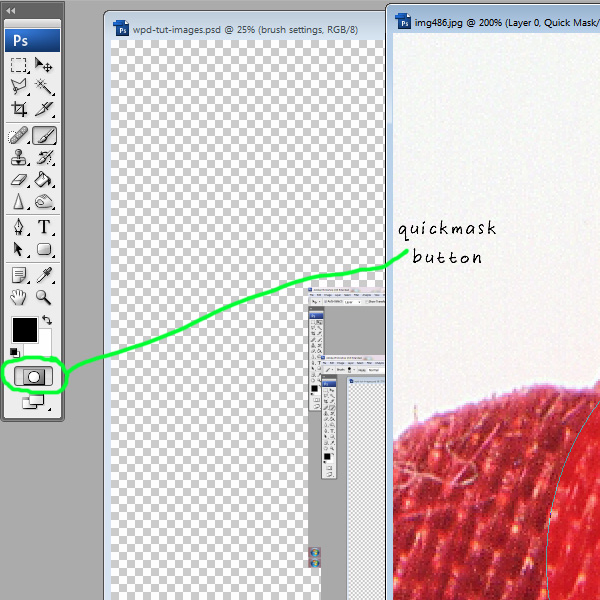
Basically you are going to be “painting” on your image. Click on the quick mask button and you’re ready to begin! I use a large brush, big enough to cover large areas at a time. I leave the little nooks and crannies to go back over with a smaller brush and the threads and strings for an even smaller brush, usually 1px.
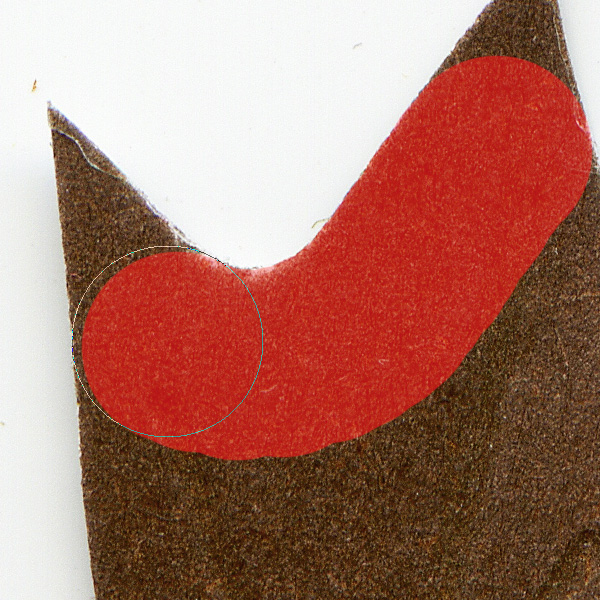
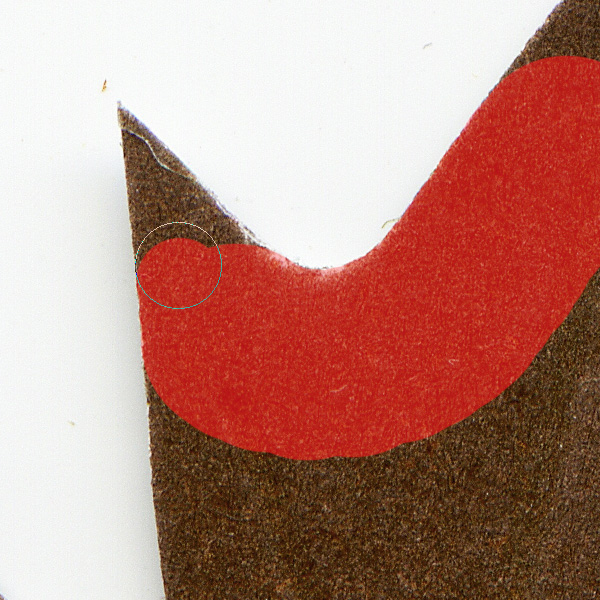
You’ll want to “brush” right up to the very edge of what you want to keep. If you go over it’s ok, simply change your color to white and brush over those areas.
Remember, black on the areas to keep, white on the areas you want to eliminate. Make sure you completely fill in your object while brushing because if you don’t you’ll have big holes. Once you’re done simply click on the quick mask button again and you’ll see your selection of marching ants. Hit delete and your background will be gone! It does take a bit of time and practice to make sure you get a nice smooth edge without any jaggedness. That’s why I use a large brush to begin with, less area to worry about an unsteady hand! I’ll go back over again and again with smaller and smaller brushes to get those areas and details the large brush will miss.
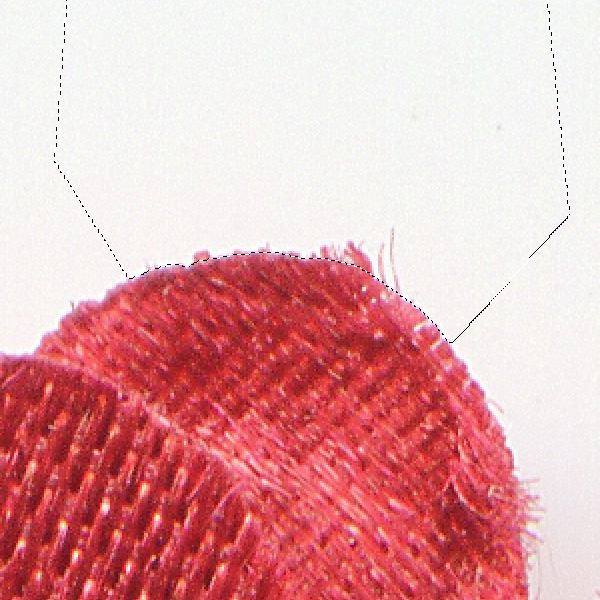
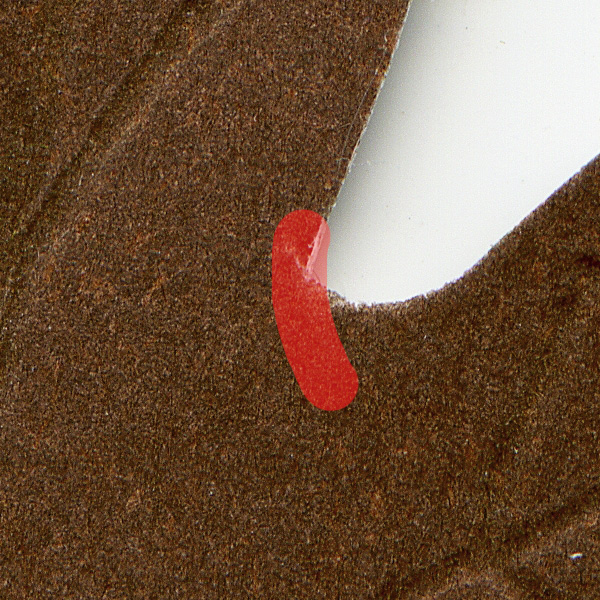
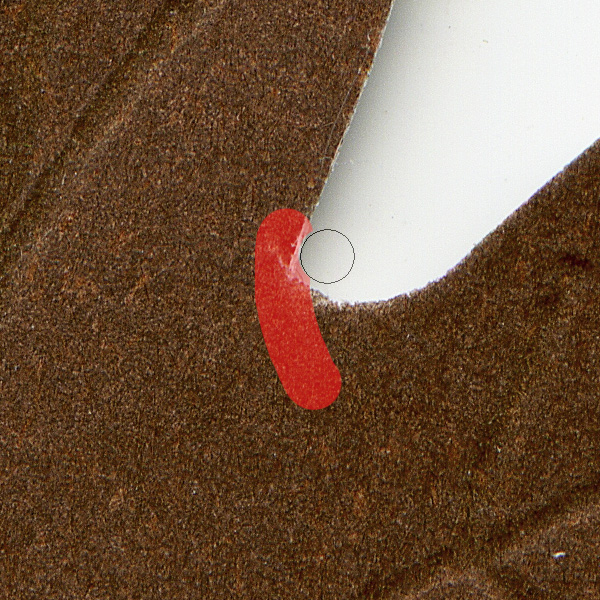
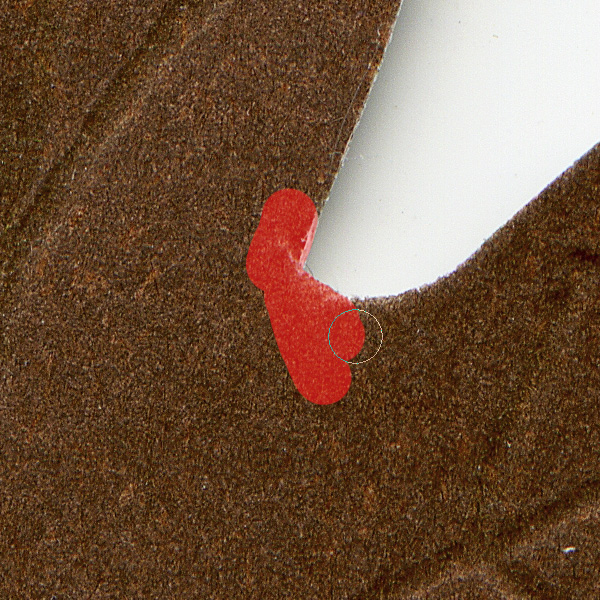
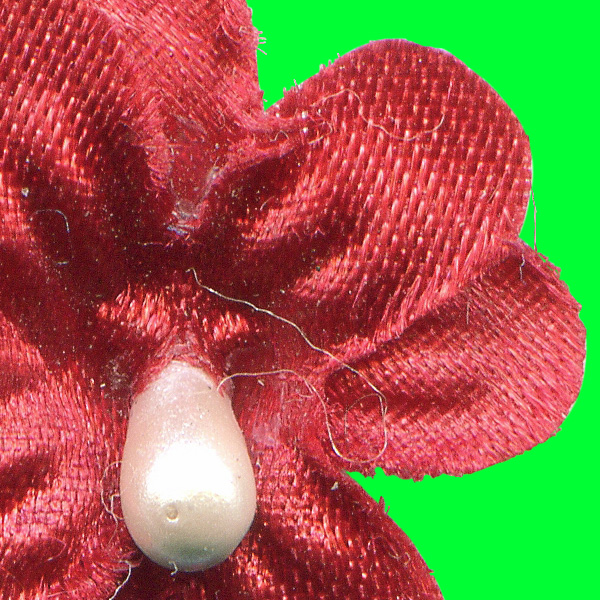
Here you can see the details that you can achieve with the quick mask versus the polygonal lasso:
So, once you’ve got your element scanned, extracted with no stray pixels and jaggies, re-sized and sharpened you have one last detail to take care of. Sometimes I’ll do this just before I re-size because it’s easier to see. Clean up! Clean up those bits of dust specks, string, hair, glitter and other bits that tend to stay on the scanner no matter what you do. This will leave you or your clients with a great finished product that is absolutely ready to use–nothing is worse than opening an element and discovering you have to spend time cleaning things up instead of creating. Well, I’m sure there’s worse things, but you get the point. It’s one of those annoyances that doesn’t have to happen if you are careful and thorough.
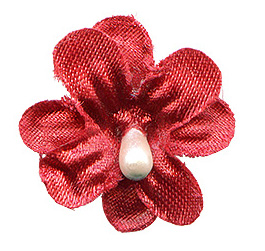
Here’s a look at the finished flower (feel free to DOWNLOAD IT and see for yourself how it looks; it comes with CU/PU-OK license/terms):
I hope you have enjoyed today’s tutorial, and possibly learned some new tips or tricks to make your ‘digital creating’ a bit easier — whether you’re designing for others, or for yourself!